

Crochet is a fun, relaxing hobby that anyone can learn. This guide will teach you the basics of crochet. You'll learn how to choose the right supplies and master six common stitches. Whether you're new or need to refresh your skills, this guide will help you make beautiful crochet projects quickly.
Crochet uses a hooked needle to create fabric by interlocking loops of yarn or thread1. It's similar to knitting but uses one hook instead of two needles1. Many people worldwide enjoy crocheting as a hobby1.
Key Takeaways
- Crochet is a fun, relaxing hobby that anyone can learn
- This guide covers the basics of crochet, from choosing supplies to mastering stitches
- Crochet uses a hooked needle to create fabric by interlocking yarn or thread loops
- Crocheting is a popular hobby enjoyed by people around the world
- Beginners can start with medium-weight yarn in a light color for best results
What is Crochet?
Definition and Introduction to Crochet
Crochet is an ancient craft that has stayed popular for centuries2. It uses a hooked needle, called a crochet hook, to make fabric by linking yarn loops3. Unlike knitting, which needs two needles, crochet uses one hook. This allows for making many items, like blankets, scarves, and stylish clothes3.
Learning crochet takes patience and practice, like any new skill2. But the rewards are great, as you can make unique, personal items that show your creativity2. Whether you're experienced or just starting, crochet offers endless ways to express yourself and create special items2.
Crochet is a calming and fulfilling hobby that brings joy and a sense of achievement2. The rhythmic motion of the hook and seeing your project grow can be very soothing2. Whether you're into its creative side or its calming effects, crochet will surely capture and inspire you2.
"Crochet is not just a hobby, it's a way of life. It's a journey of self-discovery, creativity, and the creation of something truly unique." - Crochet Enthusiast
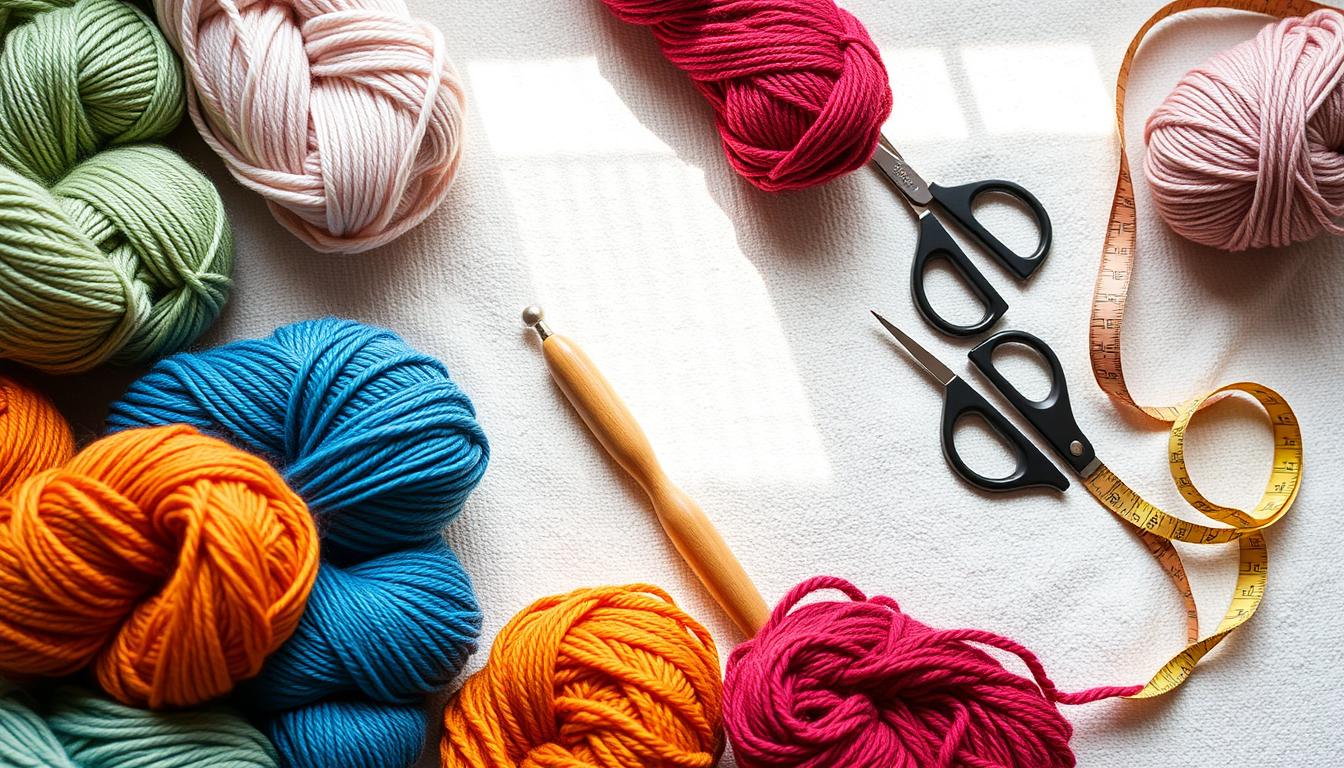
Essential Crochet Supplies
To start crocheting, you need a hook and yarn4. But, having extra tools can make crocheting better and more fun. Let's look at the main supplies every beginner should have.
Choosing the Right Yarn
Choosing the right yarn is key in crochet. Pick a medium-weight (worsted) yarn in a light color and smooth texture4. This type is best for beginners because it's easy to see your stitches as you learn4. Yarns like acrylic, wool, cotton, and blends have different qualities for different projects5.
Selecting the Proper Crochet Hook
Your hook size should match your yarn's weight. Start with a size G6 (4.25mm) or H8 (5.00mm) hook4. Hooks are made from materials like aluminum, steel, and wood4. Beginners often prefer ergonomic or aluminum hooks4.
Additional Tools for Beginners
While a hook and yarn are basic, other tools are helpful too:4
- Yarn needles: Good for weaving in ends and seaming.
- Stitch markers: Mark your place, especially in the round5.
- Scissors: Sharp scissors are key for cutting yarn cleanly.
- Measuring tape: Helps measure your projects accurately.
Other nice-to-have items include a hook case, project bag, yarn bowl, and row counter4. With these supplies, you're ready to start crocheting6.
How to Hold the Crochet Hook
Learning how to hold your crochet hook is key to starting your crochet journey. You can use either the pencil grip or the knife grip. Try both to see which one feels right for you7.
Pencil Grip vs. Knife Grip
The pencil grip means placing your thumb on the hook's flat side and resting it on your index finger. Then, curl your other fingers around the hook. The knife grip is when you hold the hook between your thumb and index finger, with your other fingers around the shaft7.
Try both grips to see which one helps you control the yarn better and feels more comfortable8. The right grip can make crocheting easier and more fun7.
"There is no right or wrong way to hold the crochet hook and yarn. It's all about finding a comfortable position that works best for you."7
As you get better at crocheting, you might change your grip. Be open to trying new ways and finding what works best for you7. The goal is to crochet easily and accurately, so don't hesitate to try different grips8.
Mastering the hook's hold will help you make beautiful projects7. Keep practicing and enjoy finding your crochet style8.
Controlling Yarn Tension
Keeping the right yarn tension is key in crochet. It affects how your project looks and its size9. To get it right, you need to learn a few important techniques.
Start by holding the yarn in your non-dominant hand. Place it over your pinky, under your third and middle fingers, and over your index finger10. Tightening your fingers increases tension, while loosening it decreases it9. Adjusting your tension as you crochet helps keep your stitches even.
If you crochet too loosely, try scooping the yarn above your pinky10. This helps control the yarn flow. Proper finger placement lets you pinch the yarn on the hook, keeping the right tension10.
On the other hand, if you crochet too tightly, relax your grip a bit9. Try different ways of holding the yarn to find what works for you9. The more you practice, the better you'll get at controlling yarn tension.
Being aware of your yarn tension lets you make beautiful, well-made crochet projects9. The right tension is crucial for a great crocheting experience9.
How to Make a Slip Knot
Starting your crochet journey begins with learning the slip knot. This basic technique helps you attach your yarn to the crochet hook. It's the first step to start your project11. The slip knot is key for crochet, loom knitting, and using knitting needles. It can be made in different ways, depending on your project11.
To make a slip knot, make a loop with the yarn and leave a long tail. Next, bring the tail over the loop and insert it from underneath11. Pull the tail to tighten the knot around your crochet hook. This method works for both right-handed and left-handed crocheters11.
Choosing the right hook size is important for your crochet projects11. After making the slip knot, you'll need to create a foundation chain to start your pattern11. It's also important to learn other essential stitches like the slip stitch, single crochet, and double crochet11.
Always check the yarn label to find the right hook size11. When you finish your project, weave in the tail end of the slip knot and cut it off11. For more free crochet patterns and projects, subscribe to our YouTube channel11.
In fact12, 100% of beginner crochet patterns start with a slip knot12. The article presents12 two methods for making a slip knot12. The slip knot itself is not counted as a chain stitch12. It's suggested to leave at least 6 inches of yarn tail for weaving in12. The article shows12 two ways to make a slip knot, using a crochet hook and your fingers. The finger method is recommended12.
| Slip Knot Technique | Description |
|---|---|
| Using Fingers | Create a loop with the yarn, bring the tail over the loop, and insert it into the loop from underneath. Pull the tail to tighten the knot. |
| Using Crochet Hook | Form a loop with the yarn, then use the hook to pull the yarn tail through the loop and tighten the knot. |
"The slip knot is the foundation for all crochet projects, and mastering it is the first step to becoming a confident crocheter."
By following these steps, you'll be well on your way to creating beautiful crochet projects. You can make cozy blankets to intricate accessories. Happy crocheting!
Creating a Starting Chain
The starting chain is the base of your crochet project. To start, you need to learn how to make chain stitches13. The chain stitch is a key skill for beginners to learn early on13. It's used to begin projects and start rows13.
Making Chain Stitches
To begin, form a slip knot and put it on your hook14. Beginners should use worsted weight yarn and a size H-8 (5 mm) hook14. Hold the slip knot in your left hand and the hook in your right.
Yarn over and pull the yarn through the loop on the hook. This creates a new chain stitch13. You'll learn how to start a chain with a slip knot, yarn over, and pull yarn through the loop13.
Counting Chain Stitches
When counting chains, ignore the slip knot and the loop on your hook13. Look for V shapes in the chain. Each V shape means one chain stitch14.
The common crochet abbreviation for chains is "ch" in both US and UK terms13. The chain stitch chart symbol looks like a "0" (zero). It shows the direction of the finished crochet work13.

Remember, mastering the starting chain is crucial for your crochet project. With practice, you'll create stunning crocheted pieces using this essential skill.
Working Into the Foundation Chain
The first row of crochet can be tough, especially when starting with the foundation chain. It's hard to know exactly where to put your hook and keep a steady grip. But, with some helpful tips, you can get better at this and start your crochet projects off right15.
Choosing between front loops or back humps of the foundation chain is important. Most people work into the front loops15, but designers might ask for the back humps for a certain look15. The number of skipped chains changes with different stitches15. Working into the back humps can look nicer15, but it might need more effort and a bigger hook15.
Using a bigger crochet hook for the foundation chain can help15. It keeps the tension even and makes it easier to find where to hook in16. Also, marking the first stitch and counting your stitches carefully can keep you on track. If it's still hard, try the foundation single crochet for better looks and control16.
With practice, working into the chain will get easier. It might take time, but don't give up. Joining crochet groups on Facebook15 can also help. You can share your work, get tips, and learn from others15.
| Working Into the Foundation Chain | Advantages | Considerations |
|---|---|---|
| Front Loops | More common approach | May not provide as finished an appearance |
| Back Humps | Can create a more finished look | May be more difficult and require a larger hook |
In summary, mastering the first row of crochet by working into the foundation chain takes practice. But, with the right techniques and tips, you can succeed. Remember to try new things, be patient, and connect with the crochet community to keep improving16.
How to Crochet for Beginners: A Step-by-Step Guide
Crocheting lets you make many things, like cozy blankets and pretty lace accessories17. This guide will help you start crocheting, whether you're new or need a refresher18.
You only need two things to start: a crochet hook and yarn17. Choose a medium-weight yarn in a light color for beginners17. The right hook size depends on the yarn and your project's look17.
First, pick how you'll hold the hook. You can use a pencil or knife grip, whichever feels right17. Keeping your yarn tension even is key for your project's look and size17.
Start with a slip knot and make a foundation chain18. It's important to count your chain stitches right to keep your project on track17.
Then, start with the single crochet stitch18. This stitch is the base of your crochet projects. With practice, you'll get better at crocheting and discover its many possibilities.

Being a good crocheter takes time. Follow this guide and enjoy the journey. You'll make your own unique crochet pieces soon18.
| Yarn Weight | Crochet Hook Size |
|---|---|
| Fingering | Steel Hook (0.6-1.5 mm) |
| Sport | Steel/Aluminum Hook (1.5-3.5 mm) |
| Double Knitting | Aluminum Hook (3-5 mm) |
| Worsted | Aluminum Hook (5-8 mm) |
| Aran | Aluminum Hook (6-9 mm) |
| Bulky | Aluminum Hook (8-15 mm) |
Keep practicing and be patient. The first rows can be tough, but ten rows will help your fingers get used to it19. With effort, you'll make beautiful crochet pieces to show off or give away.
"Crocheting is a simple craft that can bring so much joy and creativity into your life. Embrace the process, and you'll be amazed at what you can create."
Basic Crochet Stitches
Learning the basic crochet stitches is key to making many different projects. The single crochet and double crochet are essential for beginners20.
How to Single Crochet
The single crochet is a great first stitch for beginners. Start by inserting your hook into a stitch, then yarn over and pull the yarn through. Next, yarn over and pull through both loops on your hook21.
This stitch is a foundation for many patterns, like a simple washcloth20.
How to Double Crochet
The double crochet is another basic stitch. Begin by yarn over before inserting your hook, then yarn over again and pull through. Next, yarn over and pull through two loops, then yarn over and pull through the final two loops21.
Knowing this stitch opens up a world of crochet patterns, from simple afghans to intricate lace designs20.
By mastering these basic stitches, beginners can start making beautiful projects. Whether you're new to crochet or need to brush up, learning the single crochet and double crochet is vital202221.
Reading Crochet Patterns
Starting with crochet patterns can seem tough, especially with special abbreviations and terms23. But, knowing these conventions is crucial for finishing your projects. Let's look at the key parts of reading and understanding crochet patterns.
Understanding Crochet Abbreviations
Crochet patterns use abbreviations to make instructions clear. You'll see SC for single crochet, DC for double crochet, and YO for yarn over23. It's smart to keep a list of these abbreviations handy23. For a full list, check out www.YarnStandards.com23.
Patterns tell you to work in rows or rounds. It's important to know the difference23. You start with a slip knot and a foundation chain. Then, you follow the instructions for the first stitches23.
Patterns use special symbols like asterisks (*) for repeated steps. Brackets [] or parentheses () show repetitions or grouped stitches23. Knowing these symbols helps you follow the pattern easily23.
When working in rounds, remember to join with a slip stitch to form a ring. Also, raise the yarn height at the start of each round23.

Learning these conventions lets you confidently read and follow complex patterns24. Patterns often include images, materials lists, and finished dimensions. They also have a notes section to help you24. With practice, you'll get better at decoding crochet patterns2324!
Finishing Techniques
After finishing the body of your crochet, you need to learn a few key crochet finishing techniques. First, you'll want to weave in any loose ends on the wrong side25. Then, block your work to get the right shape and size. Finally, add any decorative edging or trim. These steps will make your crochet project look professional and polished.
Weaving in Ends
Weaving in loose ends is a vital step in how to weave in ends in crochet. Use a tapestry needle to hide the yarn tails on the wrong side. This way, you can make your crochet look clean and seamless.
Blocking
Blocking means gently stretching and shaping your crochet to its perfect size. It helps even out stitches and opens up lace patterns. This is especially important for items like shawls and afghans that need to fit just right.
Edging and Trim
Adding a decorative edging or trim can really make your crochet stand out. You can crochet a simple border, create a fancy edging, or use a pre-made trim. Techniques like slip stitch, single crochet, or picot stitch can give your work a professional touch.
Learning these crochet finishing techniques will take your projects to the next level. Weaving in ends, blocking, and adding decorative edging are all crucial steps. They ensure your crochet creations are finished with care and look their best.
Troubleshooting Common Beginner Mistakes
Crochet uses a hooked needle to make fabric by linking loops of yarn or thread26. It's a favorite hobby for many, but beginners face common challenges. Stay patient and keep trying. If you see a mistake, it's okay to "frog" (rip out) and start over. With practice, you'll learn to spot and fix these issues.
One big problem for beginners is uneven tension26. Getting the yarn tension right is key for your project's look and size. Try different ways to hold the yarn, like the pencil grip or knife grip, to find what works for you26.
Dropped stitches can be really frustrating for newbies26. Use stitch markers to keep track and count your stitches at the end of each row. If you lose a stitch, don't worry - there are ways to fix it.
Starting the chain can also be tricky for beginners2627. The chain can be too tight, affecting the first stitch. Try using a bigger hook or a different starting method, like the magic circle or foundation single crochet.

If you hit a snag, look for online tutorials, stitch guides, and crochet communities for help26. With patience and practice, you'll master these common mistakes and become a skilled crocheter26.
| Common Crochet Mistakes | Troubleshooting Tips |
|---|---|
| Uneven Tension | Experiment with different gripping methods, such as the pencil grip or the knife grip. |
| Dropped Stitches | Utilize stitch markers and carefully count your stitches at the end of each row. |
| Tight Starting Chain | Use a larger hook for the chain or try alternative starting methods like the magic circle or foundation single crochet. |
| Incorrect Gauge | Adhere to the recommended gauge measurements to ensure your project doesn't grow or shrink. |
| Yarn Knots | Learn the Russian join technique to rejoin yarn when encountering knots. |
By tackling these common mistakes and using the tips provided, you'll become a confident and skilled crocheter2627.
Beginner-Friendly Crochet Projects
As a beginner crocheter, you're ready to try new things. There are many easy crochet projects for beginners28. These projects let you practice and make beautiful items28.
There are over thirty different sizes of crochet hooks for various patterns28. Patterns show the hook sizes in US or Metric measurements28. Most hooks are between 3 mm and 15 mm28. Beginners often use medium (#4) weight yarn with 5.5 mm or 6.5 mm hooks28.
Some great simple patterns for beginners include scarves, hats, cowls, and dishcloths29. There are 31 quick and easy projects for beginners29. These include things like scarves, hats, cardigans, socks, and earrings29.
For home decor, beginners can make pillows, blankets, baskets, and rugs29. As you get better, you can try more complex patterns and accessories29.
Beginners should pick light or bright yarn colors and label their work clearly29. Start with solid colors before trying variegated yarns29. For hooks, look for aluminum, plastic, or wood, and sizes around 4.5mm to 5.5mm29.
There are many beginner-friendly patterns and tutorials out there29. You can make scarves, hats, shawls, socks, and more29. You can even make household items like potholders and plant hangers29. As you keep practicing, you'll find endless possibilities for your crochet projects2829!
Conclusion
Learning to crochet is a rewarding and versatile skill that anyone can pick up30. It's perfect for starting a new hobby, making handmade gifts, or relaxing with a craft. This guide has given you the tools and knowledge to start your crochet journey31.
Beginners should use size 4 and up yarn and a size 5.5mm or size I-9 hook for size 4 yarn31. The guide suggests making 21 chains for practice and 20 single crochet stitches on the first row.
Keep practicing, try new stitches and patterns, and enjoy the journey30. Video tutorials can teach you different techniques, like the magic loop method for starting in the round30. Stores like Michael's and Jo-Ann have everything you need for crocheting.
Learning to crochet brings many benefits, like a sense of accomplishment and the chance to make unique items.
So, why not pick up crocheting and start a rewarding new hobby? With this guide, you're ready to begin. Happy crocheting!
FAQ
What is crochet and how is it different from knitting?
Crochet is a craft that uses a hook to make fabric from yarn or thread. It's like knitting but uses one hook instead of two needles. You can make many things like blankets, scarves, and hats with crochet.
What supplies do I need to start crocheting?
You need a crochet hook and yarn to start. Tools like yarn needles and stitch markers can help. Choose a medium weight yarn and a G6 or H8 hook for best results.
How do I properly hold the crochet hook?
You can hold the hook in two ways: the pencil grip or the knife grip. Try both to see what feels right for you.
How do I control yarn tension when crocheting?
Yarn tension affects your project's look and size. Hold the yarn in your non-dominant hand and adjust your grip to change tension. This helps keep your stitches even.
How do I make a slip knot and a starting chain?
To make a slip knot, loop the yarn and pass the tail through it. Then, pull the tail to tighten. For a starting chain, hold the slip knot and yarn over, then pull through to make a new stitch. Keep making stitches until you have the right number.
What are the basic crochet stitches I should learn first?
Start with single crochet and double crochet. For single crochet, insert the hook, yarn over, and pull through. Then, yarn over and pull through both loops. Double crochet is similar but yarn over twice before pulling through.
How do I read and follow crochet patterns?
Patterns use special abbreviations like SC and DC. Learning these and following the instructions is key. Pay attention to stitch abbreviations and row counts.
What are some common mistakes beginners make when crocheting?
Beginners often struggle with uneven tension and dropped stitches. Stay patient and don't be afraid to start over. Online tutorials and crochet communities can help.
What are some good beginner-friendly crochet projects to start with?
Start with simple scarves, hats, cowls, or dishcloths. These projects help you practice while making beautiful items. As you get better, try more complex patterns.